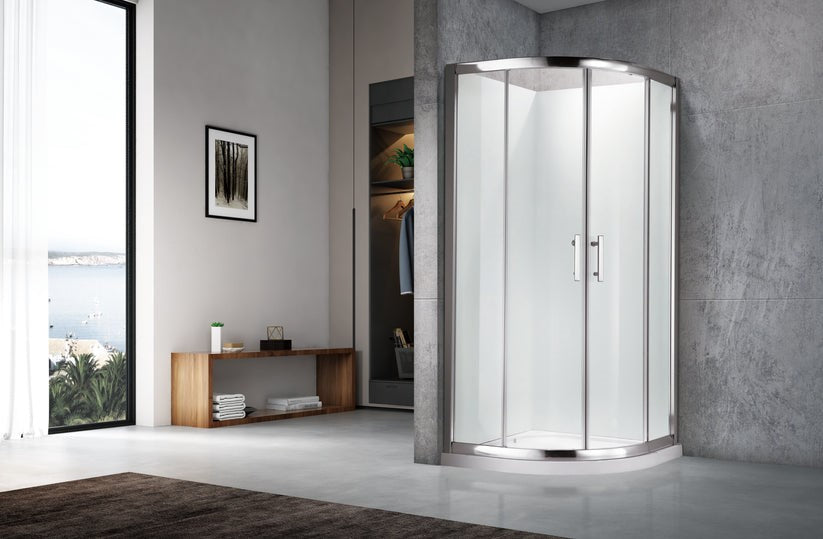
Thinking about giving your bathroom an upgrade with a new shower enclosure, also known as a shower box? You’re in good company. Shower boxes, with their stylish shower doors, have become a top pick for Kiwi homes, not just because they look sharp, but they’re practical and tough enough to handle heavy traffic, especially with newer designs like sharp 6mm toughened safety glass with strong aluminium frames. If you’re taking on a DIY install, you’ll be after simple, honest advice to avoid frustrations and end up with a stylish, leak-proof result.
Let’s walk through what’s involved in getting your new shower box set up—starting from the prep work, through to tips to make things easier, tools you’ll want to have handy, and how to avoid some common mistakes.
Is It Really Worth Doing Yourself?
Lots of folks worry about fitting a shower box, but with a bit of planning, some patience and decent instructions, it’s definitely within reach for anyone confident with tools. The most common units, especially the pre-fabricated 6mm framed models, are designed for straightforward installation. There’s a saving to be made here too: by following the right steps, you can avoid paying tradies for shower installs in New Zealand, which can cost anywhere from $700 to $1500, depending on complexity. Doing it yourself could save up to 50-80% of those costs.
But what about plumbing or waterproofing? If you’re just swapping out like-for-like and you’re not touching the pipes or modifying drains, you can skip the plumber. Always double check council or building code requirements if you plan major changes.

What’s Inside the Typical Shower Box Kit
When your box arrives, here’s what’s usually included:
● Framed shower glass panels (usually safety glass, 6mm thick)
● Aluminium wall profiles and floor frame
● Sliding or hinged shower door set
● Handles and seals
● Fixings and screws
● Step-by-step instructions
You’ll need to supply your own silicone sealant and basic tools.
The Tools You’ll Want
Before unboxing, grab these:
● Cordless drill + drill bits for tiles/masonry
● Screwdrivers
● Tape measure & pencil
● Level (spirit level, at least 60cm long)
● Hacksaw (for trimming aluminium profiles, if needed)
● Caulking gun & silicone sealant (shower-specific, mould resistant)
● Safety gear: gloves and protective glasses
A helper is also highly recommended—glass panels aren’t light.
Planning: Getting Your Space Ready
Don’t rush. Prep properly. Most headaches come from uneven walls or dodgy floors.
Start by measuring your alcove or corner to check your shower box is the right size. Many New Zealand showers are made to fit either 900mm x 900mm or 1000mm x 1000mm. Measure twice. Confirm the tray and walls are all plumb (vertical) and flat.
Here’s a handy check-list to run through before you open the packaging:
|
Check |
Good Spot |
Not So Good |
|
Floor level (no dips/bumps) |
Yes |
Fix before starting |
|
Walls plumb and flat |
Yes |
Shim or re-plaster |
|
Existing plumbing in place |
Yes |
Get a plumber |
|
No signs of leaks or rot |
Yes |
Repair first |
If there’s a problem (like water damage or uneven floors), sort this before going further. The shower box, or shower enclosure, won’t compensate for those issues and you’ll end up with leaks.
Positioning the Shower Tray
Start with a clean, dry base. Dry-fit the shower tray, checking it sits level in both directions. The tray is your foundation—if it’s not perfectly level, you’ll never get the shower door to slide smoothly or keep water in. Use packers (plastic shims) under the feet if needed.
Some trays need to be glued down or sealed with silicone—read the instructions for your kit. Leave a 24-hour cure time for adhesives before moving to the next steps.
Check the waste (drain) lines up with your plumbing. If not, minor adjustments are usually manageable, but major shifts can require a pro.
Fitting the Wall Profiles
Next, the vertical aluminium profiles that hold the glass. Mark up on your tiled walls or lining board the positions for fixing these. Drill carefully, especially through tiles—to avoid cracks, use a tile bit and low drill speed.
● Hold the profile in place and check it’s plumb with your level.
● Mark holes, remove the profile, and drill.
● Fit wall plugs if your walls are masonry or plasterboard.
Fix profiles with screws provided—don’t overtighten, as this can deform the aluminium.
Mounting the Glass Panels
Pack a mate for this bit—those toughened glass panels are heavy and awkward. Most panels will slot straight into the wall profiles, resting on the tray. Secure gently with the fixings provided.
Don’t rush tightening the fasteners. Overtighten and you’ll end up with cracks or tension in the glass. Ensure the rubber seals sit tight along all tray and wall edges. These keep water inside and stop noisy glass-on-metal contact.
Door Assembly
The shower door comes next—sliding doors or pivot doors, depending on your set.
● For sliders, fit the rollers to the top of each door, then hang onto the upper track.
● Check alignment with the tray and adjust for smooth operation.
● For pivots, fit hinges as per instructions and check the swing—make sure it closes flush, with no gaps.
Fit handles by hand, don’t use power tools. That helps avoid thread stripping.
At this stage, test open and closing a few times. The doors should move cleanly and feel snug when shut.
Sealing the Shower Box
Now onto sealing, which is often where people go wrong. Use a good quality, mould-resistant silicone designed for wet areas. Apply a steady, even bead along the inside edges where the glass meets the tray and walls. Avoid sealing the base on the outside—this lets any trapped water inside escape, preventing mould or swelling.
Don’t touch the silicone for at least 24 hours before using the shower. Any sooner, and you risk washing it away.
 Checking for Leaks
After the silicone has set, test run water around all edges. Watch for leaks and wipe away spills quickly. It’s rare for a new shower box to leak if installed as per the instructions, but better to find issues now than down the track.
Keep an eye out for:
● Water escaping where the glass panel meets the tray (seal more carefully if wet spots appear)
● Shower door not closing fully
● Noisy movement (may mean misalignment)
If you do find a small leak, a fresh bead of silicone usually sorts it. If there’s a larger problem (like leaks from plumbing behind tiles), you may need professional help.
A Few Kiwi Tips for a Smoother Install
Over the years, plenty of New Zealand DIYers have learned some handy lessons:
● Always read the instructions specific to your shower enclosure kit—small design changes over time can mean big differences.
● It’s easier to work with two people, especially for lifting and aligning glass.
● A long level ensures a flat fit across larger trays, avoiding water pooling in corners.
● Always measure twice before drilling through tiles. Tile repairs can be pricey later.
If you want to bling it up later, consider swapping standard chrome handles for matt black, or soft-close rollers for an even quieter glide. Many local suppliers now offer these little extras.
When to Call the Pros
It’s true that most home handypeople can take on this project themselves. But sometimes, it pays to call in the experts:
● If the wall or floor is out of alignment by more than 5mm over a metre
● If the shower is going onto a timber floor with flex or rot
● If you’re unfamiliar with working around mains plumbing
Likewise, don’t be afraid to reach out to suppliers like Domenic Bathroom Ware if you need advice mid-install. Most top brands offer Kiwi-based support and plenty have YouTube guides if you get stuck at any stage.
Maintenance, Cleaning and Aftercare
Once installed, it’s smart to get into a regular cleaning and maintenance routine:
● Use a squeegee after each shower to deter water spots and soap scum.
● Only use non-abrasive cleaners on the glass and frame.
● Check seals every 6 months for signs of mould, shrinkage or damage.
● Reapply silicone if you notice any little gaps forming, especially in high-use areas.
Many modern shower boxes use Euro-style clear seals that snap in and out for easy replacement. These are widely available from New Zealand bathroom merchants.
The Domenic Bathroom Difference
For those considering brands, features like 6mm toughened glass and solid aluminium frames aren’t just marketing fluff—they make a real difference in everyday use. They handle the knocks, resist corrosion (think steamy Rotorua or beachside corrosion!), and are designed for the rigours of Kiwi rentals or busy family homes.
A quality shower box also adds value when selling—bathrooms consistently pull the highest scores on home value surveys by Barfoot & Thompson and OneRoof, with 80% of buyers placing a premium on a tidy, modern bathroom. If you’re after practicality, durability, and a simple install, there’s lot to be said for buying from proven New Zealand suppliers.
Ready to roll up your sleeves and take the first steps to get started? All you need is a plan, a bit of patience, and the right parts and tools. In just a weekend, you can give your bathroom a completely new look, save a tidy sum, and know it’s done to your standards. If ever stuck, there are plenty of local experts, video guides, and DIY forums always willing to help out. So, go on—make the space yours.
If all else fails, there’s always the trusted local bathroom merchant for expert installation or those extra finishing touches. Happy renovating!